How To Export Field Permissions for Multiple Objects for Multiple Profiles In Salesforce using BOFC App?
For Instance: Is there is a requirement for Salesforce admins or developers to perform below actions for single or multiple objects for multiple profiles:
- Compare or Export Field Permissions (in XLS)
Solution: For a developer, managing field permissions actions for single or multiple objects in Salesforce is a tedious and time taking job. User would have to open each fielder profiles one by one for an object using Salesforce Standard process. These types of work requests would take much more effort and time, but with our Salesforce Appexchange Bulk Object Field Creator (BOFC) App user can (Compare or Export or Update) field permissions for multiple objects and for multiple profiles within same Salesforce org in few clicks.
Benefits of using BOFC Application:
- Supports both Standard and Custom Objects
- User can Compare or Exports Field permissions for single or multiple objects in a single click
- Admins can Update Field Permissions for Multiple Objects in XLS form
- Simple drag & drop UI
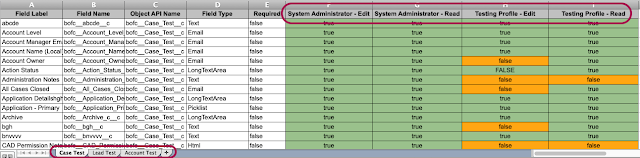 |
| Sample Export Results for Field Permissions |
Explore below Steps to manage Field Permissions actions:
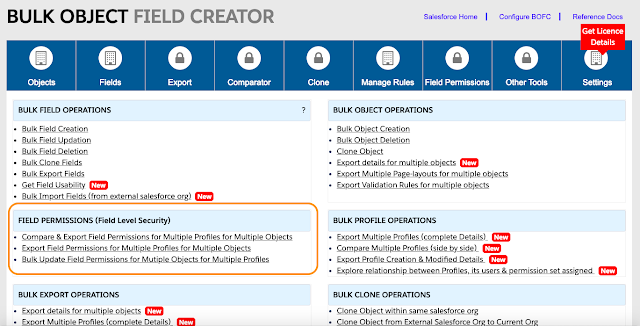
1. Open the BOFC Home > Goto Field Permissions Section
2. It will open below screen for Field Permissions
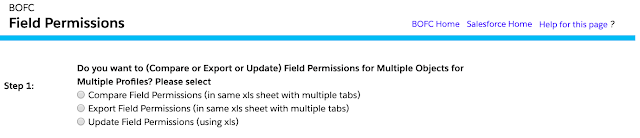
3. Select any one “action type” from the radio buttons
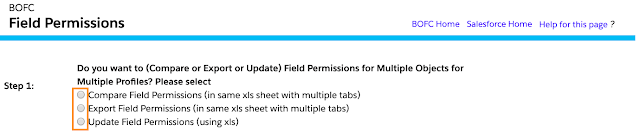
4. If user select “Compare” or “Export”, it will show below screen:
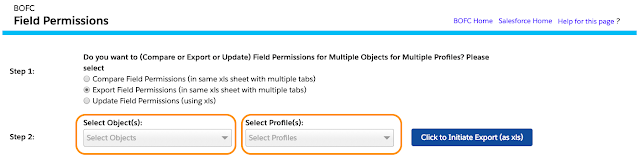
Please select single or multiple objects, and select single or multiple profiles. Once done then click on “Click to Initiate Export (as xls)” button.
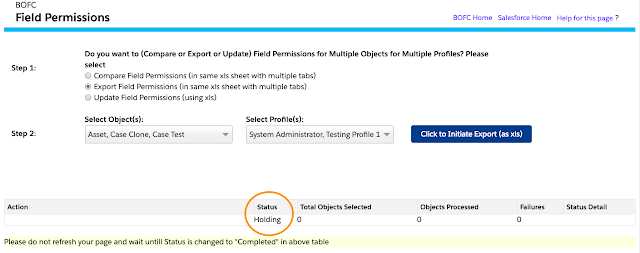
5. Please don’t refresh your page, until the status is changed to “Completed”
Once it is completed, it will show below screen.
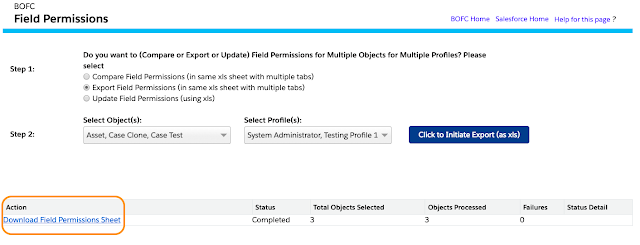
Click on the Download link as per the above image and your file for field permissions is ready for download for multiple objects.
Comments
Post a Comment